All posts by kirtimane

EGGLESS MINT CHOCOLATE CHIP ICE CREAM RECIPE – MINT ICE CREAM WITH MINT SAUCE

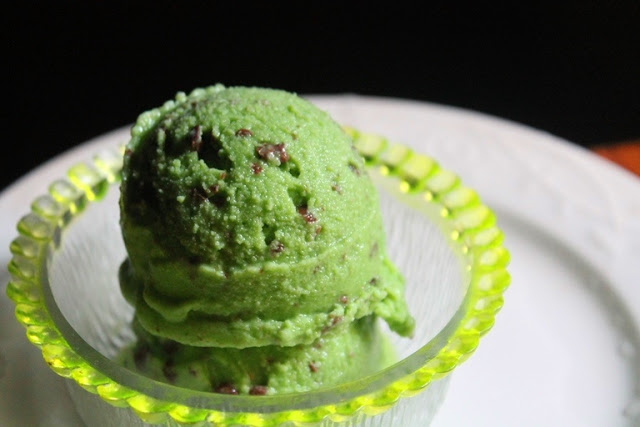
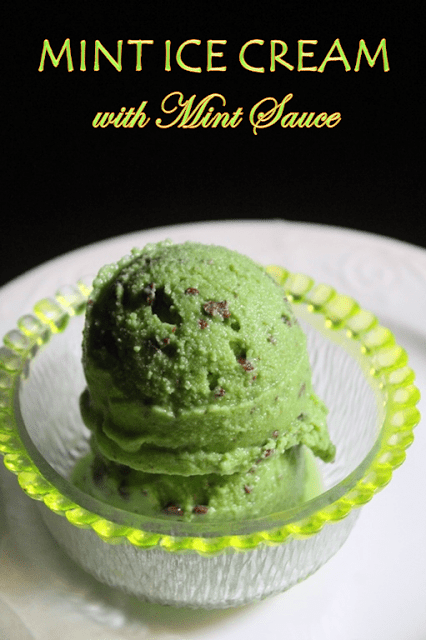
I had this vision of making a mint icecream with mint sauce for a long time. I have tasted it lots of times in baskin robbins, it is my sissy favorite icecream. So i wanted to recreate it so badly. I used to buy a bunch of mint to make this ice cream, then i used to forget and the mint will either turn bad or gets used up in other recipes.

Finally i made a bunch of mint leaves couple weeks back and made it the very next day. First i thought of making this with GMS & CMC like my vanilla icecream recipe. Then i thought to make it plain and simple using cornflour so everyone can try it out,. 

I used fresh mint leaves and little mint essence to make this. If you dont have mint essence, you can use few drops of vanilla essence. it will still taste great. Hope you will give this a try and let me know how it turns out for you.

Preparation Time : 10 mins
Cooking Time : 30 mins
Setting Time : overnight
Makes: 500 ml

Ingredients:

For Icecream:
Mint Leaves – 1.5 cups packed
Sugar – 1 cup
Milk – 1/2 liter / 500 ml
Cornflour / Corn Starch – 1 tblspn
Green Food Colouring a pinch
Mint essence or Vanilla essence – few drops
Cream – 1/4 cup (optional)
Chocolate Chips – 1 cup

For Mint Sauce:
Mint Leaves – 1 cup packed
Sugar – 1/2 cup
Green Food Colouring a pinch
Mint essence or Vanilla essence – few drops
Water – 1 cup

Method:

For Icecream:

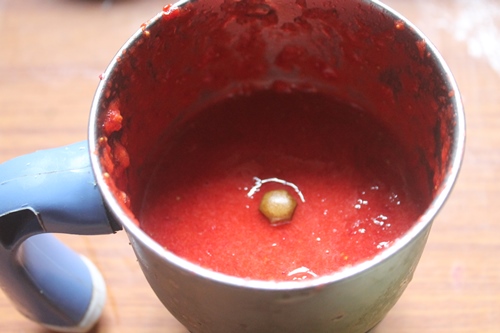
  • Take mint and sugar in a blender pulse it so it is blended.
  • Take milk in a sauce pan, add the mint and sugar mix in it. Mix well and put it on heat and bring to a boil. Now simmer the flame and cook for 15 mins on a very low heat.
  • Now strain this mix, press and extract as much mint as possible.
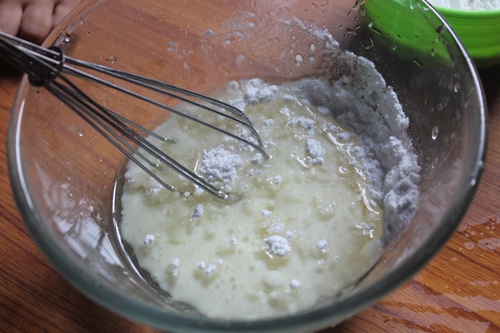
  • Now take this milk in a sauce pan, add cornflour mix which is mixed with water. to it and cook till it thickens.
  • Now take it off the heat and add in green food colouring and mint essence. Mix well.
  • Cool it down and pour it into a freezer container and freeze for 3 hours or so. Now take it out and add in cream and blend till creamy for 2 mins. POur it back in the bowl and freeze again for few hours.
  • Now remove it and take it in a blender, add chocolate chips and blend again for a min or so.
  • Pour it back in the bowl and freeze overnight.
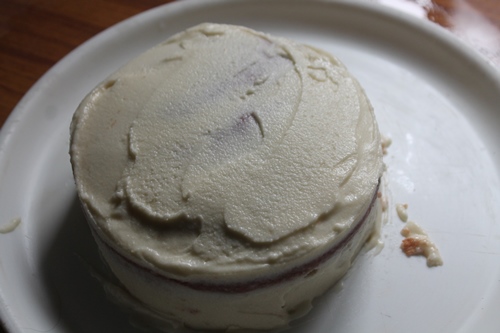
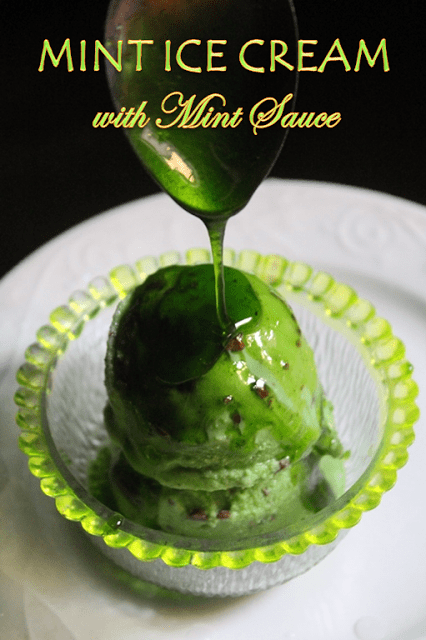
  • Now scoop and serve with mint sauce.Recipe below.

For Mint Sauce:

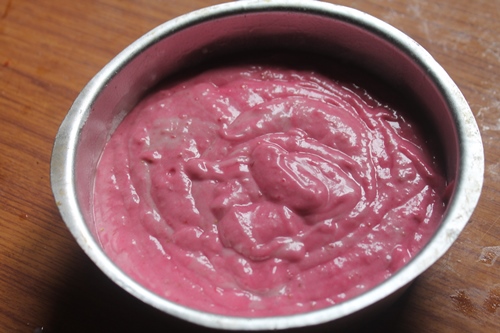
  • Take mint and sugar in a blender, add water and make it into a puree.
  • Now take this in a sauce pan and heat on a low heat till it is melted.  Simmer for a min.
  • Now strain this and take the syrup back on heat. Cook till it reaches one string consistency.
  • Now add in mint essence and green colour.
  • Cool it and serve with icecream.
Scoop this icecream in the bowl & top with mint sauce and serve


VEGETABLE GRILL SANDWICH RECIPE / BOMBAY VEG GRILL SANDWICH RECIPE

Sandwiches are my favourite, i make them quite often, i would say atleast 3 to 4 times a week. But each time i make, i try different sandwiches and love to experiment it. Recently i have been addicted to these bombay style sandwiches and i have been making lots of them. I have taken pictures of them as well, will share all those recipes in the coming post..

This is a simple vegetable sandwich, but what makes this sandwich very unique is the green chutney and sandwich masala. Normal veg sandwich can be quite boring, but this sandwich has the punch to it..

Hope you will give this a try and let me know how it turns out for you..

  • Preparation Time : 10 minsCooking Time : 15 minsMakes : 3 SandwichesIngredients:
  • Bread Slices – 6Sandwich Green Chutney as needed
  • Cucumber Slices as neededTomato Slices as needeed
  • Tomato Slices as needed
  • Onion Slices as needed
  • Boiled Sliced Potatoes as needed
  • Boiled Sliced Beetroot as needed
  • Butter as needed

Method:

  • Take two bread slice, spread some butter on both the slices.
  •  Spread some chutney over the buttered side of both the bread. 
  • Arrange veggies and sprinkle sandwich masala over each veggies
  • .Cover with other slice of bread butter and green chutney side down.Spread some butter over it.
  • Place it over a heated grill butter side down and spread some more butter on other side. Cover and grill till golden.
  • Remove to a plate and spread some butter on top side and sprinkle with sandwich masala.
  • Cut into wedges and serve.

PISTACHIO CUPCAKES WITH ROSE BUTTERCREAM FROSTING

Nothing shouts Indian festivals better than pistachio cupcakes and rose flavors. This is precisely why I am bringing to you these delicious and decadent Pistachio cupcakes with rose buttercream frosting! I love cupcakes so much, I can’t even. Buttercream has to be my number one weakness and with these pistachio cupcakes, the rose buttercream is just flawless.

BAKING THE PERFECT PISTACHIO CUPCAKES WITH ROSE BUTTERCREAM :

To get your cupcakes perfect (more perfect, haha), I would also like to suggest some tips. I assure you, you will fall in love with baking cupcakes once you realize how easy they are!

  • Use an ice cream scooper to get the perfect quantity of the batter in the cupcake liners.
  • Do not push two cupcake trays into your oven. Put one batch of your cupcakes in the center of the oven for even and uniform baking.
  • Never forget to pre-heat your oven.
  • To test whether your cupcakes are done or not, you can always use a toothpick. However, when you think your cupcakes are evenly baked, you can push the center with your finger. If it bounces back, they’re completely baked. (Only try this with cupcakes that have cooled down a bit).

Ingredients:

  • ½ cup pistachio powder
  • ¾ cup flour
  • ½ cup castor sugar
  • ¼ teaspoon baking soda
  • ½ teaspoon baking powder
  • ½ cup milk
  • 1 egg
  • ¼ cup oil
  • 1 teaspoon vanilla
  • Ingredients for the frosting-
  • ½ cup unsalted butter
  • 1 cup icing sugar, sifted
  • 2 teaspoon kewra extract
  • 2-3 drops of pink colour

Instructions:

  1. Preheat the oven to 180 degrees C. Line a cupcake tray with liners.
  2. In a bowl, combine pistachio powder,flour,baking soda and baking powder
  3. Mix all the dry ingredients well.
  4. In a large bowl, add milk,egg,oil and vanilla extract. And mix well.
  5. Using a spatula, gently fold in the dry ingredients into the wet ingredients. Mix only until well combined.
  6. Using an ice-cream scoop, transfer the batter into the cupcake tray, filling almost to the top.
  7. Bake at 180 degrees C for 25-30 minutes. Let the cupcakes cool.
  8. To make the frosting, beat softened butter with an electric mixer until it is completely smooth.
  9. With the mixer still running, gradually add icing sugar. Beat until the sugar is well incorporated and the frosting is fluffy.
  10. Add in the kewra extract and pink colour and mix well.
  11. Frost the cupcakes with Rose Buttercream and serve!

CHOCOLATE CARAMEL COOKIES

Imagine biting into chewy cookies with a warm, caramel filling. I know it feels no less than heaven and I assure you that you’ll love me endlessly for this recipe. Plus, these chocolate caramel cookies are extremely easy to make. They take the standard cookie baking time- approximately one hour- (baking included), and end up being the star on all your gatherings too1 I believe, if you are in a rush to make any dessert, you can simply prepare a batch of cookies. The best part about cookies is that you can play so much with one single dough! Even with these chocolate caramel cookies, convert them into Nutella cookies. Simply replace all the steps related to dulce de leche in this chocolate caramel cookies recipe with Nutella and you’re good to go!

FOLLOW THE GIVEN STEPS TO ENSURE YOU HAVE THE BEST CHOCOLATE CARAMEL COOKIES:

  • The gooey center is a result of freezing your dulce de leche. Do not skip out this step at any cost.
  • Use softened butter for your chocolate caramel cookies.
  • Do not use huge balls of the dulce de leche.

Cookies, just like cakes, could be baked in several different ways, as per your preference. Whether you want them flat, or full and bloated, whether you like them soft or like them dense and crunchy; cookies can be of various shapes or textures. The idea is to add the right ingredients in the right amount whether it be the flour, the sugar, or the eggs.

RECIPE FOR CHOCOLATE CARAMEL COOKIES:

Ingredients:

  • ½ cup butter, softened
  • ½ cup lightly packed brown sugar
  • ½ cup castor sugar
  • 1 egg, at room temperature
  • 1 tsp vanilla extract
  • 1 cup all-purpose flour
  • ¼ cup cocoa powder
  • 1 tsp cornstarch/ corn flour
  • ½ tsp baking soda
  • ½ cup chocolate chips
  • ½cup dulce de leche

Instructions:

  1. Pre heat your oven to 180 degrees and line a baking tray with a silicon mat or parchment paper.
  2. Beat butter and the sugars until the mixture is light and fluffy
  3. Beat in the egg. Add vanilla.
  4. Add the flour, cocoa powder,baking soda and corn flour to the butter mixture and mix until the dough comes together.
  5. Freeze small balls of dulce de leche for 15 minutes in the freezer.
  6. Scoop out your dough into balls of equal sizes the prepared baking tray.
  7. Flatten the balls using your fingers and stuff them with the frozen dulce de leche balls and fold up the edges of the cookies And seal the edges.
  8. Top the cookies with chocolate chips generously.
  9. Bake the cookies for 12-15 minutes at 180 degrees.
  10. Once baked let them cool on a wire rack for at least 10 minutes

no knead cheese bread

First of all, how good is warm, crusty, soup-dunkable bread.

Secondly, take that and times-it by 100 because how good is warm, crusty, soup-dunkable CHEESE bread. Remember this life-changing No Knead Bread? Let’s take it next-level.

We’re talking a beautiful loaf of cheese bread that you MADE, you boss baker you! With your own two hands. Your own two clean hands that didn’t need to do anything fancy except hold a bowl and a wooden spoon.

This cheese bread is soup’s best friend. It is crusty and golden on the outside – enough to really crackle when you tear into it – but the inside is pillowy and soft with an appropriate amount of density from that melted cheese holding it all down. Please put down all the knives and just pull it apart with your hands in hot, steaming chunks. It’s a rustic, hands-on bread and it doesn’t need you to pretend.

HERE’S HOW TO MAKE NO KNEAD CHEESE BREAD:

Step 1: Stir up a dough – with a wooden spoon is perfect. Work a little cheese in there. Cover and let it rest.

Step 2: Now it’s puffy and loose, so just roll it out and onto a piece of parchment. Bake it in a Dutch Oven with a tight-fitting lid, and finish without the lid to get it browned.

Step 3: Tear into it. Dunk it. Butter it. Butter and salt it. Dunk it again. Impress your friends and family because you are a now a person who makes homemade cheese bread.

Grab your soup bowls. Put on your sweaters.

No Knead Cheese Bread season is upon us!

creamy thai sweet potato curry

So now we know what kind of food they serve in heaven.

It’s for surely gotta be sweet potato curry, for surely for sure. There just cannot be anything else.

I’m not just talking about just any old curry -> I’m talking about the kind of curry that hits that perfect spot between silky-creaminess and fire-breathing flavor all in one sweeping, saucy bite.

For example, just off the top of my head: Creamy Thai Sweet Potato Curry that can be made in about 20 minutes and that just makes your heart sing for joy when you remember that you have at least three servings of it left in the fridge and you are about to win big at Leftovers Lunch.

There is not one single thing I don’t love about this type of food.

You know those recipes that you make once, and then you make twice, and then suddenly a week has gone by and you’ve really only made that one same recipe and you realize that you’re either a boring person for making the same thing over and over again or (more accurately) a winner for knowing which recipes are worth your time?

LET’S TALK CURRY PASTE

Store bought red curry paste works just fine in this recipe. It’s how I started making it, actually. But then I did something that ended up being magical: I started adding a spoonful of homemade yellow curry paste in with the store bought red curry paste and BOOM! Flavor explosion. Maybe it’s all in my mind, but probably not – the curry paste combo is just epically delicious.

Three Curry scenarios here:

  1. You are intimidated by curry-making. Just buy some red curry paste (available at most grocery stores these days) or grab some on Amazon because you have Prime with 2 day shipping, don’t you, you little smartie? I knew we were twinning on that.
  2. You are not intimidated by curry-paste-making. In which case you are probably too advanced to be reading this blog.
  3. You are semi-intimidated by curry-paste-making, but you are intrigued. Friend, you are the perfect middle child that I seek for this assignment. I so strongly encourage you to try your hand at making this adapted, familiar-ingredients version of homemade Thai yellow curry paste. Keep that jar of golden love close at hand because it will go on to gift you many batches of fragrant, cozy curries all through the winter with just the swish of your spoon. I am very, very excited for you.

HOW TO MAKE CREAMY THAI SWEET POTATO CURRY?

Step 1: Start your HOMEMADE curry paste (you rockstar, you). Roast your garlic, shallots, and ginger. Hydrate your chili peppers. Blitz it all up in the food processor with some spices, lemongrass paste, and cilantro. Easy peasy.

Step 2: Add your shallots, sweet potatoes, and curry paste to the pot.

Step 3: In goes the coconut milk to make things extra luscious. Add your broth and cover. After your sweet potatoes have softened for a bit, add the spinach.

Step 4: Let your fresh herbs, peanuts, and fish sauce (omit if vegetarian/vegan!) join the party. Stir to combine.

Step 5: Serve over hot, fluffy rice and top with more peanuts and cilantro (obvi). DIVE IN and live your best curry-loving life.

Pistachio nougat Recipe

It has been a long time since I have made any confectionary. Brings me back to the days as a professional chef, which for some reason feel ancient. My sugar skills feel rusty as I try to remember all the steps involved. It was second nature once.

I wanted to share with you a recipe that felt festive and also could be beautifully packaged and shared. I might be a bit late as I know many of you are probably done with your holiday preparations and ideas. That is what Pinterest is for.

I share this recipe for pistachio nougat and wish all of you peace for the end of this year. A tumultuous one all over the world. Thinking of all the people who are suffering, have lost loved ones, displaced, away from family, the unknown what lies ahead.

The trick to nougat is to cook the sugar to a hard crack stage otherwise, the nougat will be soft and never really set. If it doesn’t set, you can still eat it but will be hard to cut it into neat squares.

Have all your equipment and ingredients ready because once the sugar reaches its temperature it goes fast. The egg whites need to be whipped before the sugar is added so you will be juggling a few things at a time.

Ingredients :

1 pound (450 g) pistachios
3 cups (600 g) sugar
1/2 cup (120 g) light corn syrup or glucose
3 egg whites
1 tablespoon powdered sugar
7 ounces (210 g) liquid honey

Instructions :

1. Line a 13×9 baking sheet with parchment paper making sure it also covers the edges of the pan. Set aside.

2. Heat oven to 350F (180C) and roast the pistachios on a baking tray until fragrant, about 7 minutes.

3. Combine the sugar, corn syrup and 1 cup of water in a small pot. Cook over high heat until the sugar reaches the hard crack stage, about 300F. This will take some time and work on your egg whites and honey. I keep a candy thermometer in the sugar syrup at all times so I can see how the temperature is rising.

4. While sugar is cooking, pour the egg whites into the bowl of a stand mixer. Using the whisk attachment, whip the egg whites over medium speed. When they become foamy, add the powdered sugar and continue whipping. They will become a bit glossier.

5. When the syrup has reached about 270F, pour the honey in a small pan and bring it to a boil over high heat. Pour the boiling honey into the egg whites while the mixer is still whipping on medium speed. Add the honey slowly and keep it close to the edge of the mixing bowl. Once all the honey has been added, continue whipping over medium-high speed. By now, the egg whites will be glossy.

6. When the sugar syrup has reached the hard crack stage, about 300F, turn the mixer speed to low and slowly add the syrup into the whipped whites in a steady stream making sure you are adding it close to the mixing bowl (if any of the sugar syrup gets trapped in the whisk attachment while whipping, the sugar can crystalize and turn to threads and we want to avoid that). The sugar syrup should be very viscous but still clear. Once all the syrup has been added, turn the mixer back to high speed and continue whipping about 4 more minutes. The whites will be very thick at this point.

7. The bowl will still feel warm to the touch. Add the pistachios into the white mixture and fold with a wooden spoon until they are evenly distributed. It will be very thick and sticky and hard to mix. Transfer the nougat onto the prepared baking pan. Wet your fingers slightly and help spread it if necessary. Cover with another sheet of parchment paper and flatten it with a rolling pen or by pressing another pan on top. Do not try to remove the parchment on top or bottom until the nougat is completely cooled. Let the nougat cool at room temperature for at least 4 hours or overnight.

8. Peel the top piece of parchment off. To cut the nougat, dip a sharp knife into hot water. Lightly dry the knife with a towel and cut the nougat into strips. Clean the knife with hot water in between cuts to avoid the knife from getting too sticky. Store at room temperature wrapped in plastic.

Keema Pakora Recipe

Try this simple recipe to make your tea times more flavoursome and crispy.

CourseSnacks
 CuisineIndian
 Prep Time10 minutes
 Cook Time20 minutes

Ingredients :

200 gm beef mince
1 tsp red chili minced
1 tsp coriander seeds crushed
1 tsp red chili powder
1/4 tsp Turmeric powder
Salt to taste
1 tsp carom seeds
1 tsp Ginger paste
Green chilies chopped 2 tbsp Fresh coriander chopped
onion chopped
egg3/4 cup Gram FlourWater as needed
Oil for frying

Instructions :

  1. Add minced beef in a bowl and mix it with red crushed chilli, salt, coriander seeds, red chili powder, turmeric powder, carom seeds, ginger paste, green chilies and fresh coriander leaves.
  2. Then add the onion, gram flour and egg while mixing the mixture very well
  3. Add water and mix thoroughly
  4. Now heat the cooking oil in a wok and fry on low flame until golden brown
  5. Serve hot with desired sauces

EGGLESS STRAWBERRY CAKE RECIPE

I love baking with berries, specially strawberries. I have baked few cakes and cupcakes using strawberries. I wanted to share a basic eggless strawberry cake recipe for a long time. I made it few days back and the cake was a super hit.

Hope you will give this a try and let me know how it turns out for you..

Preparation Time : 10 mins
Baking Time : 25 to 30 mins
Serves: 4 to 6
Recipe Source: Food Connection

All Purpose Flour / Maida – 3/4 cup (90 grams)
Sugar – 1/2 cup (100 grams) powdered
Oil – 1/4 cup (60 ml)
Yogurt – Curd – 1/4 cup (60 ml)
Baking Powder – 1/2 tsp
Baking Soda / Cooking Soda – 1/4 tsp
Salt a pinch
Strawberries – 1/2 cup pureed
Any Frosting of your choice as needed

(My 1 cup measures 240 ml)

Method:

Grease a 8 to 10 cm cake pan with oil and dust with flour. Set aside. Preheat oven to 180 degree C.

Take all purpose flour, baking soda, baking powder and salt in a bowl and mix well. Set aside.

Take strawberries in a blender and puree till smooth. Set aside.

Take sugar, oil, yogurt in a bowl and mix well till creamy.

Add in strawberry puree and mix well.

Add the flour mix and fold gently. Spoon this into the cake pan and bake for 20 to 25 mins.

Remove from oven and cool completely.

Now slice them in half and decorate with your favourite frosting.

Serve.

Cover complety and serve.

HOW TO MAKE UNICORN CAKE – UNICORN THEMED BIRTHDAY CAKE

Unicorn cake is perfect for a themed party for your daughter. This is a magical party and a fun birthday party.

Maha wanted a unicorn themed birthday party this year. So i decided to try a cake myself. I decided to bake a simple vanilla cake and cover with whipped cream. I ordered all the things needed for the decoration a month inadvance. I have added all the links to the product. This cake may not be a professional looking cake but it is made with so much love. So i thought of sharing it here.

Unicorn cake is perfect for a themed party for your daughter. This is a magical party and a fun birthday party. Author: Aarthi Recipe type: Dessert Cuisine: Indian

Ingredients :

  • All Purpose Flour / Maida – 2 cups
  • Sugar – 1½ cup
  • Unsalted Butter – 100 grams
  • Egg Whites – ¾ cup
  • Milk – ¾ cup
  • Oil – 3 tblsp
  • Almond Extract – 1 tsp
  • Vanilla Extract – 1 tsp
  • Baking powder – 2 tsp
  • Salt a pinch
  • Sprinkles – ½ cup
  • Whipped cream as needed
  • Pink, Blue, Purple Food Colour as needed

Instructions :

  1. Preheat oven to 180 degree C.
  2. Grease three cake pan with oil and dust with flour and coat on all sides.
  3. Take flour, baking powder, salt and mix well.
  4. Take butter, oil and beat till creamy.
  5. Add sugar, vanilla and almond and mix well till creamy.
  6. Add in flour mix ½ and the milk and beat till mixed.
  7. Add remaining flour and fold gently.
  8. Spoon this into three cake pan and bake for 25 to 30 mins.
  9. Cool completely.
  10. Remove and decorate it with whipped cream.
  11. Refer pictures for idea.